What Is Root Rot? Fix Your Damage Plants Roots
What Is Root Rot? Fix Your Damage Plants Roots Root rot is a fatal plant disease caused by oxygen-starved, waterlogged soil that enables parasitic water molds (Pythium, Phytophthora) and fungi (Fusarium) to rot root tissues. Deprived of oxygen, roots suffocate, die, and decay, preventing the plant from absorbing water and nutrients.
Root rot is a progressive, often fatal condition caused by a combination of oxygen-deprived soil and aggressive, opportunistic pathogens. While commonly described as a simple case of “overwatering,” root rot is actually a complex physiological and biological breakdown occurring beneath the soil line.
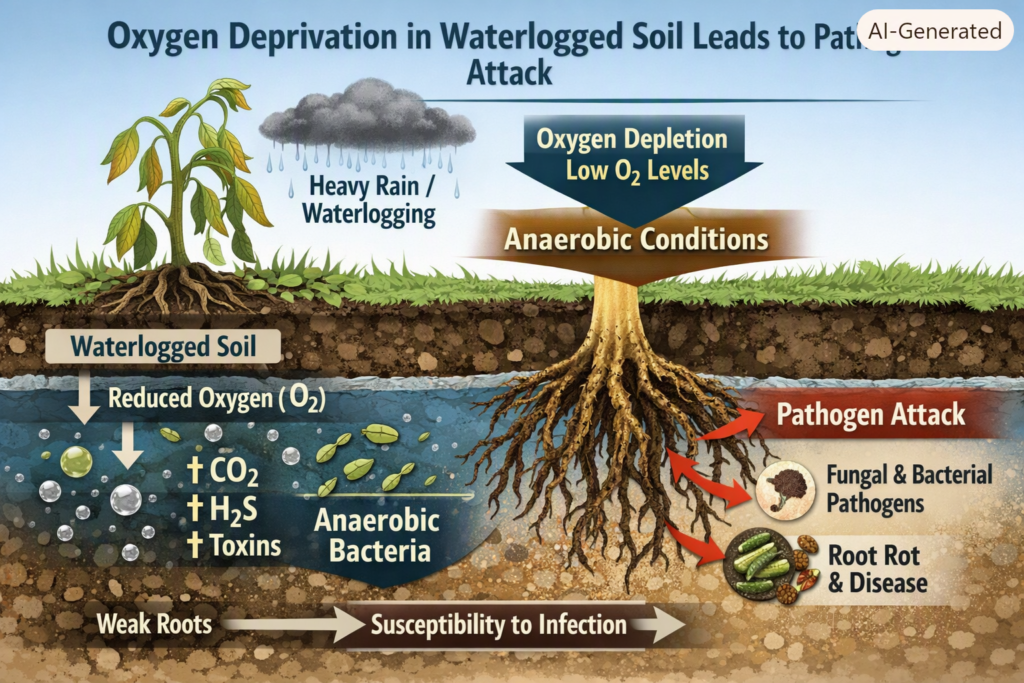
[Saturated Substrate] ➔ [Oxygen Deprivation] ➔ [Root Cellular Asphyxiation] ➔ [Pathogen Explosion] ➔ [Vascular Collapse]
The Oxygen-Starvation Chain Reaction
To understand root rot, you must first understand root respiration. Plant roots do not just absorb water and dissolved minerals; they also require gaseous oxygen (O2) within microscopic soil pores to fuel cellular respiration.
When a plant sits in waterlogged, compacted, or poorly draining substrate, these vital air pockets fill completely with stagnant water. Without access to oxygen, roots cannot generate ATP (cellular energy). Within 24 to 48 hours of total oxygen deprivation:
- Cellular Asphyxiation: Root parenchyma cells collapse, losing structural integrity.
- Vascular Shutdown: The plant loses the osmotic pressure required to pump water and minerals up to the canopy.
- Tissue Decay: Deprived root tissues die, forming an ideal organic breeding ground for anaerobic microorganisms.
Opportunistic Pathogens: Fungi vs. Oomycetes
While oxygen starvation weakens the plant, microscopic pathogens execute the final decay. These organisms thrive in dark, cold, wet, anaerobic (low-oxygen) conditions:
- Oomycetes (Pythium & Phytophthora species): Commonly known as “water molds,” these are non-fungal microorganisms that produce mobile, swimming spores called zoospores. These spores detect chemical exudates leaking from stressed, suffocating root tips and actively swim through water-filled soil pores to invade host tissues.
- True Fungi (Rhizoctonia & Fusarium species): These fungal pathogens attack weakened tissue, secreting enzymes that break down cellulose and lignin—turning healthy, firm roots into hollow, liquid-filled tubes.
Standard synthetic fungicides formulated exclusively for true fungi often fail against water molds like Pythium because oomycete cell walls are made of cellulose rather than chitin. Effective treatment requires restoring soil oxygen levels while applying target-specific antimicrobial sanitation.
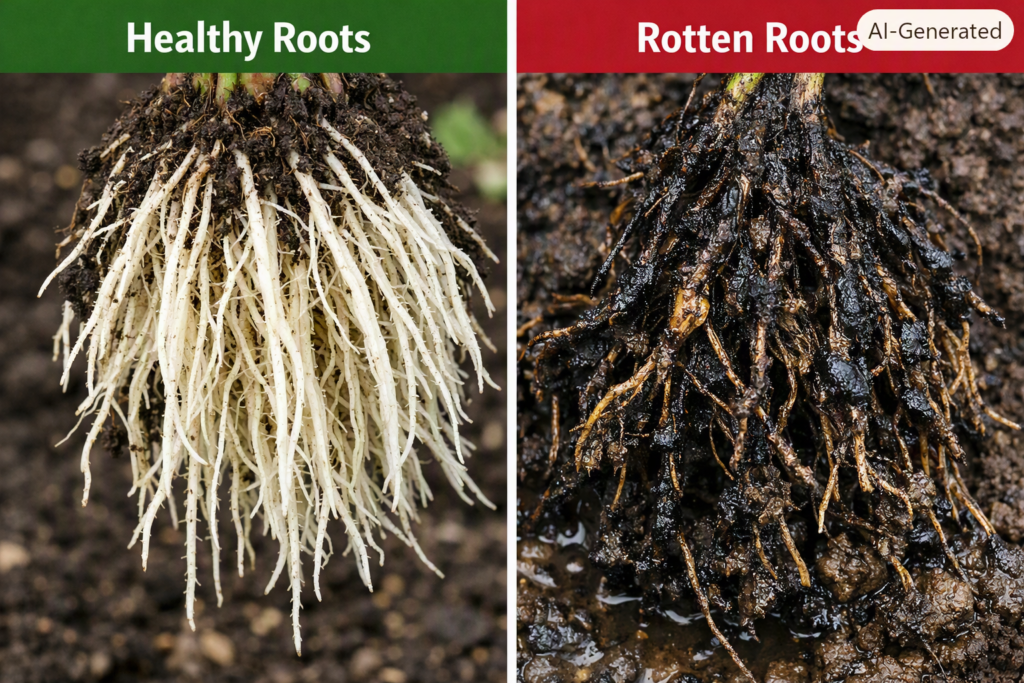
Overwatering vs. Root Rot: The Critical Difference
One of the most destructive myths in plant care is that overwatering and root rot are identical. Treating them as the same condition leads growers to make fatal mistakes—such as leaving an infected plant in rotten soil to “dry out,” which gives pathogens time to destroy the vascular system entirely.
Why Frequency Kills, Not Water Volume
Pouring a gallon of water through a pot in a single sitting does not cause root rot—provided the substrate drains within seconds and air pockets return within a day or two.
Root rot is driven by watering frequency and prolonged saturation. When you water a plant every two days without allowing the upper root zone to dry and aerate, you keep the roots in a constant state of oxygen deficit.
- Overwatering is an environmental condition: excess substrate moisture with insufficient aeration. (See our step-by-step guide on When to Water your Plants in Day or Night? – knowabteverything.
- Root Rot is an active biological infection: cellular breakdown caused by pathogens invading oxygen-deprived tissue.
Diagnostic Comparison
Use this diagnostic matrix to determine whether your plant is suffering from simple water stress or an active pathogen invasion:
| Diagnostic Feature | Overwatered Plant (Early Stage) | Active Root Rot (Advanced Infection) |
|---|---|---|
| Substrate Condition | Wet, cool, heavy, but odorless | Wet, stagnant, smelling sour, swampy, or sulfurous |
| Root Texture & Color | Firm, flexible; white, light tan, or yellow | Soft, mushy, fragile; dark brown, grey, or jet black |
| Root Sheath Test | Outer bark stays firmly attached when pulled | Outer sheath slips off easily, leaving a thin vascular thread |
| Foliage Symptoms | Soft, limp yellow leaves; general drooping | Blistering chlorosis, black base spots, rapid leaf drop |
| Reversibility | High: Allow soil to dry, increase light and air movement | Low: Requires root surgery, chemical sterilization, and fresh substrate |
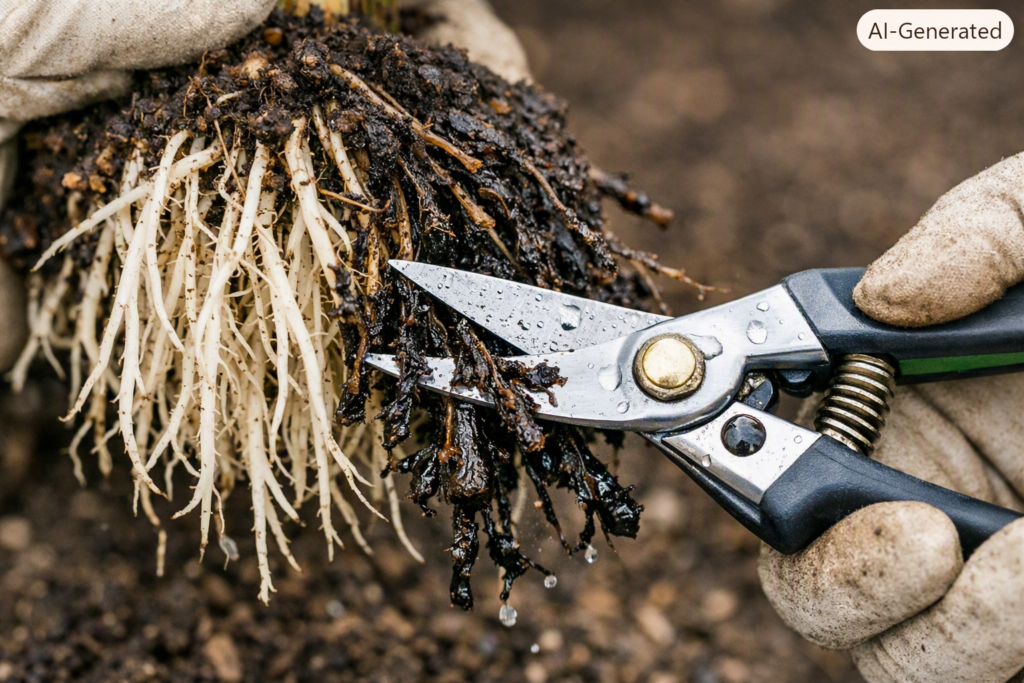
3. Signs of Root Rot (Above & Below the Soil)
Because root rot develops underground, foliage symptoms are frequently misread as dehydration. This leads well-meaning growers to add more water, accelerating the decay.
   ABOVE-GROUND WARNINGS            BELOW-GROUND CONFIRMATION
   ---------------------            ------------------------
   • Paradoxical Wilting            • Black, Mushy Root Texture
   • Interveinal Chlorosis          • Slipping Root Bark Sheaths
   • Softened Stem Base             • Swampy/Sour Substrate Odor
Above-Ground Warning Signs
- Paradoxical Wilting: The plant wilts and droops despite sitting in visibly wet soil. This occurs because destroyed roots can no longer transport water upward, leaving the canopy dehydrated despite abundance at the roots.
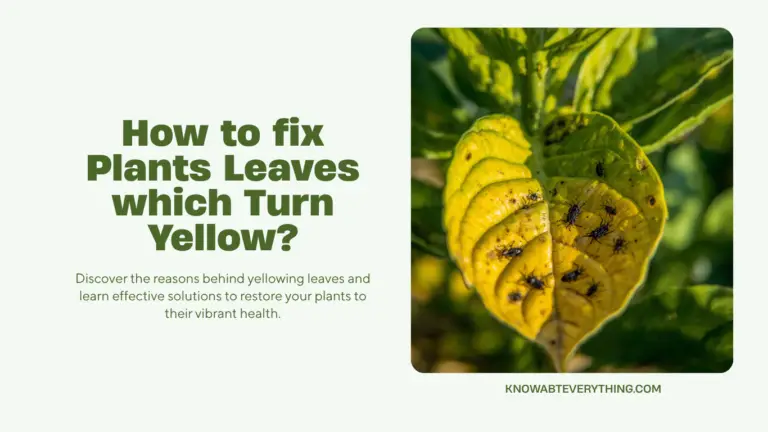
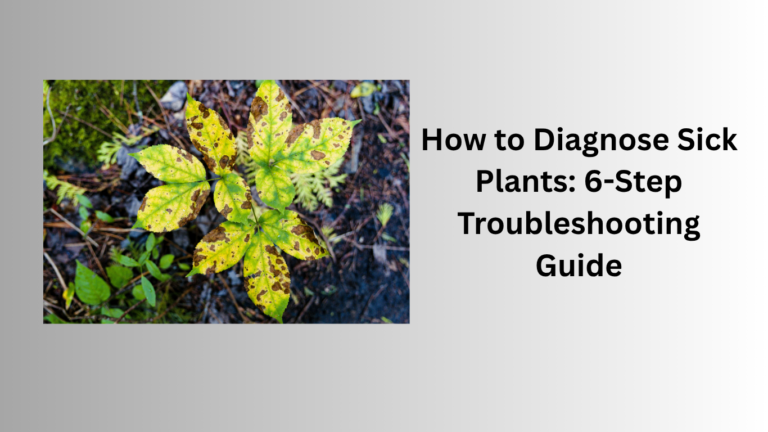
- Interveinal Chlorosis & Leaf Drop: Lower, older leaves turn pale yellow first as the plant reallocates mobile nutrients to survive. Dark, water-soaked patches may appear near leaf bases or petioles. (Read our complete breakdown on How to fix Plants Leaves which Turn Yellow? – knowabteverything.
- Base Softening: In advanced cases (common in Sansevieria and Peperomia), decay travels up the vascular cambium, turning the lower stem soft, squishy, or black.
Below-Ground Confirmation Signs
- Color Shifts: Healthy roots are generally creamy white, bright yellow, or tan. Rotting roots turn dark brown, grey, or jet black.
- Fragile Structure: When squeezed gently between two fingers, infected roots collapse, releasing liquid and leaving behind a string-like inner core.
- Sour Odor: A healthy root ball smells like fresh rain or clean topsoil. An infected root ball emits a foul, swampy, or sulfurous odor caused by anaerobic bacterial decomposition.
4. Emergency First-Aid: How to Fix Root Rot Step-by-Step
If your plant has active root rot, adjusting your watering schedule will not save it. You must perform surgical intervention to stop the spread of infection.
STEP 1: Unpot & Wash Roots ➔ STEP 2: Trim Rotten Tissue ➔ STEP 3: Disinfect Remaining Roots ➔ STEP 4: Sterilize & Downsize Pot ➔ STEP 5: Repot in Aerated Substrate
Step 1: Unpotting & Root Washing
Carefully ease the plant out of its container. Gently tap off saturated soil chunks. Bring the root ball to a sink or wash station and rinse away all remaining substrate using lukewarm water (65–75∘F/18–24∘C). You must expose the raw root network to distinguish healthy tissue from active rot.
Step 2: Surgical Root Trimming
Sterilize micro-tip pruning shears or scissors using 70% Isopropyl Alcohol. Carefully snip away all dark, mushy, hollow, or foul-smelling roots.
- Make your cuts 0.5 to 1 inch into clean, healthy, firm root tissue to ensure no microscopic fungal hyphae remain.
- Crucial Sanitation Rule: Wipe your blades with rubbing alcohol between every single cut to avoid transferring microscopic pathogens to uninfected root tissue.
Step 3: Chemical Dip & Sanitation
Sanitize the remaining healthy root system against lingering spores using a dilute hydrogen peroxide wash:
Sanitizing Dip Ratio=1 part (3% Household Hydrogen Peroxide):4 parts (Water)
Submerge the clean root system in this solution for 5 to 10 minutes. You will observe mild effervescence (bubbling) as oxygen oxidizes surface pathogens. Alternatively, spray roots with a copper-based liquid fungicide or dust cut ends with elemental sulfur powder. (See our guide on Which are the Best Organic Fertilizers for Indoor Plants? – knowabteverything).
Step 4: Pot Sterilization & Container Downsizing
Never place a newly treated plant back into its old container or substrate without complete sanitation:
- If reusing a ceramic or plastic pot, scrub it thoroughly using a 10% bleach solution (1 part household bleach to 9 parts water), then rinse thoroughly and dry.
- Downsize the Pot (Practical Rule): If you trimmed away 50% of the root mass on a plant originally in a 6-inch pot, you must downsize to a 4-inch pot. Placing a reduced root system into a large pot creates an oversized moisture reservoir that will trigger root rot all over again.
Step 5: Repotting in High-Aeration Substrates
Repot using a fresh, dry, porous substrate (see recipes in Section 6). Position the plant at its original soil line. Do not fertilize immediately. Nitrogen salts in fertilizer can easily scorch newly pruned, sensitive root ends. Lightly moisten the mix and set the plant in bright, indirect light.
5. Root Rot Across Different Environments
Root rot manifests differently depending on your plant species and growing setup. Adapting your treatment strategy to the specific environment is critical for long-term recovery.
                           ENVIRONMENTAL VARIANTS
                                     │
      ┌──────────────────────────────┼──────────────────────────────┐
      ▼                              ▼                              ▼
INDOOR TROPICALS              SUCCULENTS & CACTI               HYDROPONICS (DWC)
• Requires coarse bark/perlite • Requires gritty, inorganic mix • Keep water <68°F (20°C)
• Avoid pure peat moss mixes   • Slice above rot; re-root stem • Add beneficial microbes
Indoor Tropicals & Aroids (Monstera, Philodendron, Alocasia)
Tropical indoor plants are naturally epiphytic or semi-epiphytic—their roots are biologically adapted to climb trees and breathe humid air rather than sit in dense dirt. In low-light indoor environments, peat-heavy soils stay wet for weeks, cutting off oxygen. Switch tropicals to coarse, chunky “aroid mixes” that maintain air pockets even when fully saturated.
Cacti & Succulents (Echeveria, Cactus, Sansevieria)
Succulents store water in their leaves and stems, making their root systems minimal and delicate. When root rot strikes a succulent, it quickly travels into the main stem, turning it translucent and squishy.
- The Fix: Cut the healthy top of the plant well above the rot line using a sterile blade. Look at the cross-section of the stem—it must be pure green with zero brown spots or dark vascular rings. Allow the clean cutting to dry out and form a hard callus for 3 to 7 days before placing it on dry, gritty soil to grow new roots.
Hydroponic & Deep Water Culture (DWC) Systems
In hydroponics, root rot is primarily caused by warm reservoir temperatures and low dissolved oxygen (DO) levels.
- Water temperatures above 68°F (20°C) lose their ability to hold dissolved oxygen, allowing Pythium water molds to multiply rapidly.
- Add heavy-duty air stones to oxygenate the water and use beneficial biological inoculants containing Bacillus amyloliquefaciens (e.g., Hydroguard) to colonize the root zone and outcompete harmful water molds.
6. Preventing Root Rot: Soil Physics & Substrate Ratios
The single most effective way to prevent root rot is to design a root zone that physically cannot stay waterlogged.
The Science of Perched Water Tables
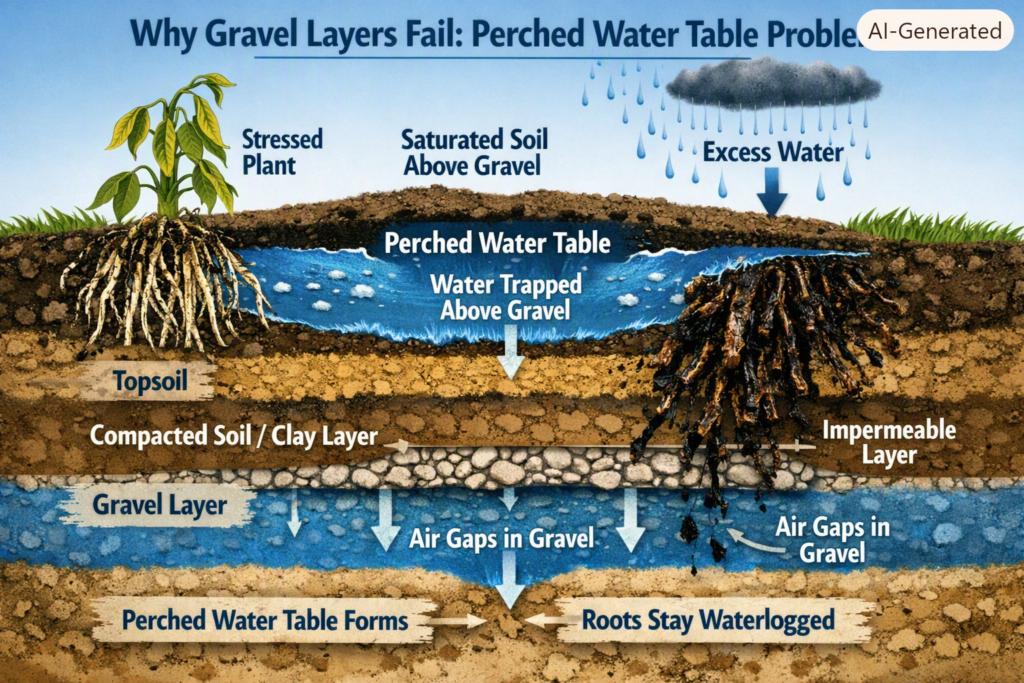
When water is poured into a pot, gravity pulls it downward. However, capillary action in fine, dense soils pulls that water back up. The boundary where these two forces meet creates a perched water table—a layer of 100% saturated soil sitting at the bottom of the pot.
The Drainage Layer Myth: Adding a layer of gravel, rocks, or clay pebbles to the bottom of a pot does not improve drainage. Instead, it raises the perched water table higher up in the pot, closer to the main root ball, reducing available root space and increasing the risk of root rot. Always use a uniform, aerated soil mixture throughout the entire pot.
   MYTH: ROCKS AT BOTTOM                 REALITY: UNIFORM CHUNKY MIX
   ┌───────────────────┐                 ┌───────────────────┐
   │    Soil Mix       │                 │  Uniform Aerated  │
   ├───────────────────┤                 │   Chunky Soil     │
   │ Saturated Layer   │ ◄── Rot Zone    │   Throughout      │
   ├───────────────────┤                 │                   │
   │ Rock Layer (Bad)  │                 │ Drainage Hole Only│
   └───────────────────┘                 └───────────────────┘
DIY High-Aeration Substrate Formulas
To eliminate root rot risks, customize your substrate based on plant family requirements:
| Plant Category | Chunky Bark / Pumice | Perlite / Coarse Lava Rock | Coir / Peat Base | Organic Additives |
|---|---|---|---|---|
| Tropical Aroids (Monstera, Pothos) | 40% Orchid Bark (Medium) | 30% Perlite / Charcoal | 20% Coco Coir | 10% Worm Castings |
| Cacti & Succulents | 0% Bark | 60% Pumice / Coarse Sand | 30% Potting Soil | 10% Volcanic Ash / Zeolite |
| Standard Houseplants (Ficus, Ferns) | 20% Fine Bark | 30% Perlite | 40% Peat / Coir Base | 10% Quality Compost |
(Want custom substrate recommendations? Explore our complete How to take care of Indoor Plants? – knowabteverything.
7. When Is a Plant Unsalvageable? (The Point of No Return)
Not every plant can be saved from root rot. Knowing when to cut your losses saves time, money, and emotional energy.
                       HEALTH EVALUATION CHECKLIST
                                    │
         ┌──────────────────────────┴──────────────────────────┐
         ▼                                                     ▼
HAS ROOT LOSS EXCEEDED 80%?                          HAS STEM VASCULAR ROT SET IN?
• Main taproot mushy & hollow                         • Stem base black, soft, or leaking
• No firm white tissue left                           • Internal vascular ring discolored
         │                                                     │
         └──────────────────────────┬──────────────────────────┘
                                    ▼
                         [PLANT IS UNSALVAGEABLE]
                   Action: Attempt Emergency Stem Propagation
The 80% Root Loss Rule
If you unpot a plant and discover that 80% or more of its root system is mushy, black, or decayed, the remaining 20% of healthy roots usually lacks the surface area required to support the leaf canopy.
Attempts to save plants past this point often result in slow, painful collapse from dehydration or recurring infection.
Emergency Propagation as a Last Resort
When a root system is unsalvageable, shift your focus from root rehabilitation to stem propagation:
- Inspect the stem above the soil line for healthy, firm green tissue.
- Cut well above any discolored or soft stem tissue using a sterile blade.
- Verify that the inner stem cross-section is clean and free of dark specks or brown vascular rings.
- Place the healthy cutting into clean water, moist sphagnum moss, or coarse perlite to grow an entirely new, pathogen-free root system.
8. Frequently Asked Questions (FAQ)
Can a plant recover from root rot on its own?
No. Active root rot will not resolve itself. The anaerobic pathogens multiplying in decayed tissue will continue traveling up the vascular system until the plant collapses. You must intervene manually by removing infected roots, sanitizing the remaining tissue, and improving soil aeration.
Does cinnamon fix root rot?
No. While ground cinnamon contains cinnamaldehyde, which exhibits mild natural antifungal properties, it cannot cure an active, internal root rot infection. Cinnamon is only useful as a light, protective dust on clean, dry cuts made during repotting to deter surface mold.
Is hydrogen peroxide safe for plant roots?
Yes, when properly diluted. A standard 3% household hydrogen peroxide solution mixed at a 1:4 ratio with water safely oxidizes anaerobic bacterial and fungal cells on contact while releasing oxygen into the root zone. However, using undiluted peroxide or higher concentrations can burn delicate new root hairs.
Can root rot spread to nearby plants?
Yes. Root rot pathogens—especially water molds like Pythium—produce swimming zoospores that travel easily through water. Shared drainage trays, reused unsterilized potting mix, unwashed pruning shears, and water overflow can quickly spread the infection to healthy neighboring pots.
Should I water a plant immediately after treating root rot?
No, water lightly. A plant that has just undergone root surgery has lost a significant portion of its root surface area and cannot absorb normal volumes of water. Lightly moisten the fresh potting mix at repotting time, then let the top 2 inches dry out before watering lightly again. Keep the plant in bright, indirect light to reduce transpiration stress while it establishes new roots.
Read about 31 Balcony Railing Planter Ideas: The Complete Design Mounting & Safety Guide – knowabteverything
6 methods to cure your Sick Plants at home. – knowabteverything